

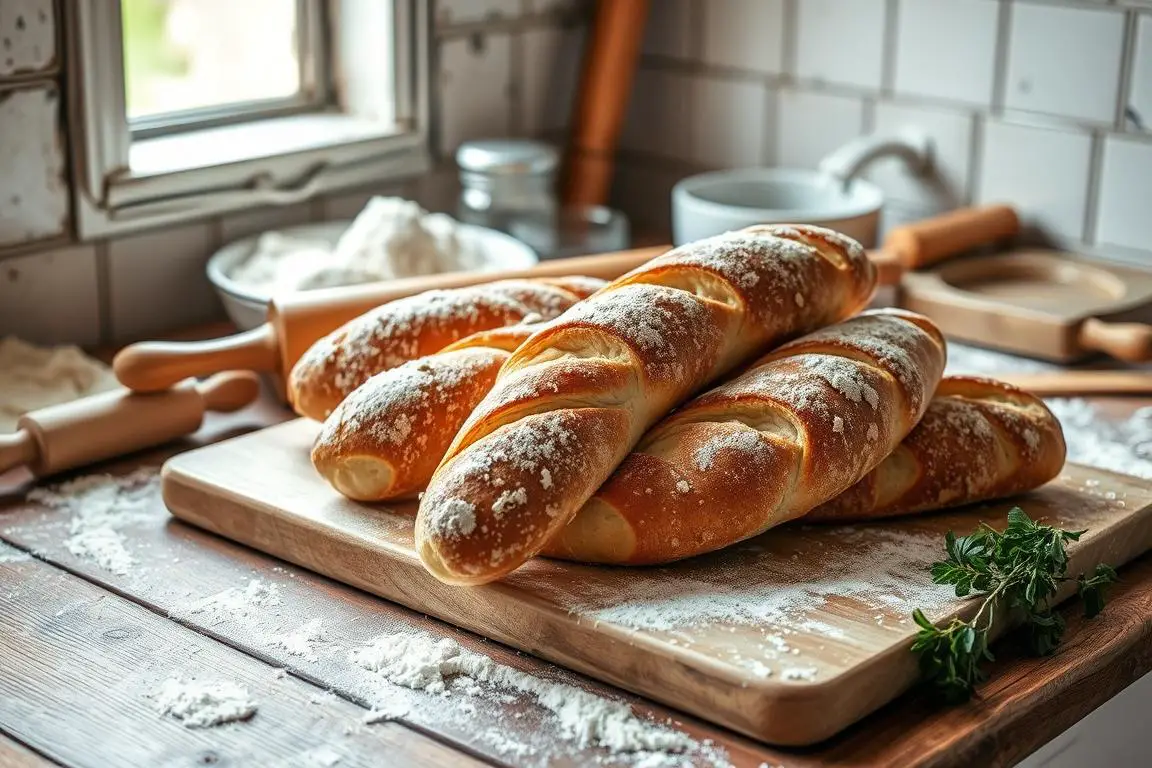
When it comes to baking, few things rival the satisfaction of pulling a golden, crusty loaf of French bread from the oven. Drawing inspiration from Julia Child’s timeless techniques in “Mastering the Art of French Cooking, Volume II,” this French bread recipe has been modernized for today’s home bakers. Whether you’re a beginner looking to try your hand at artisan bread or an experienced baker aiming to perfect your homemade baguettes, this detailed guide will walk you through each step, ensuring enjoyable and successful baking.
Crafting this bakery recipe begins in the morning due to the extended periods required for the dough to rise. Using a stand mixer simplifies the kneading process, but you can also opt for the traditional hand-mixing method. By the end of the kneading, your dough will be smooth, elastic, and slightly sticky, ready to rise and develop flavor. Two stages of proofing – each allowing the dough to double in size – are essential to achieving French bread’s characteristic texture and volume. Parchment paper or linen can aid in the final proofing, and a pizza stone will help get a perfectly crisp crust in the oven.
To elevate your homemade baguettes, consider adding steam during baking by placing a pan of water in your oven. This helps the dough rise further and produces that coveted crispy exterior. Essential tools for this recipe include a stand mixer (preferably with a dough hook), a baking stone, and a lame or sharp knife for scoring. Your kitchen will soon be filled with the tantalizing aroma of freshly baked French bread, promising a delightful experience for all your senses.
Key Takeaways
- This authentic French bread recipe can be made in under 3 hours, with most time devoted to dough rising.
- The recipe involves double rising for both bulk fermentation and loaf proofing, enhancing texture and flavor.
- Using a French loaf pan allows circulation for a crispy crust while baking at 375°F for 20-25 minutes.
- Steaming the oven by adding ice cubes ensures the bread achieves a crisp crust.
- Proper cooling is essential to avoid a doughy interior – ensure the bread is fully cooled before slicing.
Understanding the Ingredients and Tools for French Bread
Bread baking is an art that requires precision and the right ingredients. To achieve that perfect crusty bread, understanding your ingredients and the essential tools can make all the difference. In this section, we will delve into the fundamental ingredients and must-have baking tools that are key to making authentic French bread.


Essential Ingredients
When it comes to yeast breads, starting with high-quality ingredients is crucial. Here are the essentials:
- Bread Flour: For a robust structure, use high-protein bread flour. This flour type contains at least 12% protein, which is vital for a good rise and chewy texture.
- Yeast: Instant yeast is recommended for its fast-acting properties. It’s easier to use and incorporate into recipes such as homemade French bread.
- Water: Use warm water to activate the yeast, ideally around 110°F.
- Sugar: A small amount helps to feed the yeast and enhances the flavor.
- Salt: Essential for flavor, be it table salt or fine sea salt.
- Olive Oil: Adds a touch of richness to the dough.
- Optional: Melted salted butter can be brushed on the crust for added flavor.
Must-Have Baking Tools
To ensure successful bread baking, having the right tools is essential. Here’s what you will need:
- Stand Mixer: While you can knead the dough by hand or use a bread machine, a stand mixer with a dough hook makes the process easier and more efficient.
- Baking Stone or Steel: These provide consistent heat, improving oven spring and yielding that perfect crusty bread.
- Baking Tray: Useful for creating steam in the oven, a crucial step for a shiny and crackly crust.
- Lame: A razor-like tool for scoring the dough. Proper scoring allows the bread to expand during baking.
- Peel or Parchment Paper: These help in transferring the loaves into the oven seamlessly.
- Spray Bottle: Handy for adding moisture to achieve a crisp crust.
With the right ingredients and tools, you’re well on your way to mastering the art of French bread baking. These elements ensure not only the perfect rise but also contribute significantly to the flavor and texture of your bread. An excellent resource for detailed steps and additional tips is this comprehensive guide on baking French bread.
| Nutritional Information Per Serving | Amount |
|---|---|
| Calories | 73 kcal |
| Carbohydrates | 15g |
| Protein | 2g |
| Sodium | 146mg |
| Potassium | 22mg |
| Calcium | 3mg |
| Iron | 0.9mg |
Preparing and Mixing the Dough
Creating impeccable homemade baguettes and authentic french pastries demands a solid foundation, starting with mixing the dough. A keen understanding of proper dough consistency and kneading techniques is crucial for your success.
Step-by-Step Guide to Mixing
Begin by combining your dry ingredients—typically flour, salt, and yeast—briefly in a large bowl. Gradually add warm water to the mixture. Use a wooden spoon to stir until a shaggy dough forms. This method ensures even distribution of ingredients.
- Combine dry ingredients: Mix flour, salt, and yeast in a large mixing bowl.
- Add water gradually: Pour in warm water slowly, stirring continuously until a shaggy dough forms.
- Rest period: Allow the mixture to sit for five minutes to let the yeast activate.
Kneading Tips for Perfect Dough
Kneading dough is an art. It transforms your shaggy mixture into a smooth, elastic dough ready for rising. The goal is to develop gluten, which provides the structure and chewiness in your homemade baguettes.
The windowpane test is a reliable method to check if your dough is ready. Stretch a small piece of dough; if it forms a thin, translucent membrane without tearing, you’re on the right track.
- Hand kneading: If kneading by hand, work the dough for about 5-7 minutes. Aim for a slightly sticky but manageable consistency.
- Machine kneading: Using a stand mixer, knead the dough for approximately five minutes at medium speed.
- Rest and repeat: Give the dough adequate rest periods between kneading to help it relax and develop structure.
For those aiming to achieve bakery-quality results at home, incorporating expert techniques can make a significant difference. Utilize the ‘sleeping bag’ roll method to create taut dough rolls, ensuring your french pastries come out perfectly shaped every time.
Proper rising is also paramount. To speed up the process, place the dough in a warm (not hot) oven. Let it rise for about 45 minutes or until doubled in size. Remember, dough that is too wet will spread, while dough that is too dry won’t rise properly. Adjust accordingly to ensure you get the soft, fluffy bread you desire.
| Process | Time |
|---|---|
| Combination and initial rest | 5 minutes |
| Kneading | 5-7 minutes |
| First rise | 45 minutes |
Incorporate these techniques and insights into your baking process, and you’ll be on your way to mastering the art of mixing and kneading dough for glorious homemade baguettes and french pastries.
Mastering the Art of Proofing
Proofing dough is a fundamental step in baking artisan bread, involving two main phases known as the first rise and second rise. Each phase plays a crucial role in developing the bread’s flavor and texture.

First Rise Tips and Tricks
During the first rise, or first fermentation, the dough is left to rest and grow. This stage typically lasts for three to five hours at a temperature of about 70°F. It’s essential to provide an optimal environment to encourage the yeast to ferment, thereby doubling the dough size and enhancing the flavor profile. Cold environments can slow down this process, so you might want to place the dough in a warm, draft-free area.
Key points for the first rise:
- Keep the dough in a container large enough to accommodate a volume increase of up to 3 ½ times.
- Use warm water and fresh yeast for better fermentation.
- Check for a soft, pillowy texture as an indicator that the dough is ready for the next step.
Preparing Your Dough for the Second Rise
After the first rise, it’s time to shape the dough and prepare it for the second rise. Gentle handling is critical at this stage to avoid deflating the dough. Fold it carefully to redistribute the gases without degassing, and let it rest for 1½ to 2½ hours until it nearly triples in size.
Tips for a successful second rise:
- Choose linen or parchment paper for the dough’s resting place to simplify transferring it to the baking stone.
- Maintain the dough in a warm and humid environment to foster better fermentation.
- Look for a light and airy texture, indicating readiness for baking.
Baking and Finishing Your French Bread Recipe
Mastering the final stages of your french bread baking technique involves proper attention to baking and cooling. Paying close attention to the details ensures that your bread not only looks amazing but also tastes fantastic. Let’s dive into the specific methods that will guarantee a perfect crusty exterior and how to handle cooling bread before slicing.
Baking Techniques for a Crusty Exterior
A crucial aspect of french bread baking is achieving the desired crusty exterior. Start by preheating your oven along with a baking stone at 375 degrees F. Using steam inside the oven can greatly enhance the crust quality. Introduce steam by placing a pan of hot water or by periodically spraying water into the oven.
Score the dough just before placing it into the oven. These cuts enable the dough to expand uniformly and contribute to the visual appeal. Bake the dough for 20-25 minutes until it’s golden brown and emits a hollow sound when tapped, indicating it’s baked through. Spraying water initially helps in developing the crust. However, remember to remove the steam halfway through the baking to solidify the crust formation.
Cooling and Slicing the Bread
Once your bread has that perfect crusty exterior, it’s vital to let it cool properly. Cooling bread allows the internal structure to set, ensuring a perfect crumb and concentrated flavors. Cool the bread on a wire rack for at least two hours before slicing. This helps the moisture inside to redistribute evenly, preventing a gummy texture.
Select a sharp, serrated knife for slicing to avoid crushing the delicate loaf. By following these steps, your french bread baking skills will reach a professional level, and your bakery recipes will consistently produce delightful bread.
Conclusion
Completing your journey through this authentic French bread recipe brings you closer to mastering bread baking like the pros. This easy-to-follow guide ensures every home chef can achieve that perfect homemade baguette, transforming your kitchen into a fragrant, bustling French bakery. From the importance of the right tools to the precision of each technique, every step is designed to enhance your bread-making skills.
By respecting each stage of dough preparation, fermentation, and baking, your loaves will exhibit the classic crispy crust and soft crumb admired in French bakeries. The meticulous guidance—including proper proofing and ideal baking conditions—ensures that even novices can produce stunning results. Remember, practice and patience are key to perfecting the artistry of bread baking.
Whether you enjoy your freshly baked baguette with savory butter and cheese, or savor it on its own, the delight of homemade French bread is unparalleled. Embrace this fulfilling baking experience, immerse yourself in the rich traditions of French bread tips, and relish the satisfying outcome. For an additional culinary journey, explore complementary recipes like cooking chicken cordon bleu from frozen to further elevate your dining experiences.
FAQ
What are the essential ingredients for an authentic French bread recipe?
Essential ingredients include high-quality bread flour (with at least 12% protein), good quality yeast (preferably instant yeast), water, and salt. Using a poolish or pre-ferment can further enhance flavor and texture.
Why is high-protein bread flour important for French bread?
High-protein bread flour provides more gluten, which contributes to a robust structure and chewy texture. This is crucial for achieving the desired crumb and crust of artisan French loaves.
What tools do I need to bake French bread at home?
Essential tools include a stand mixer (optionally with a dough hook), a baking stone or steel, a lame or sharp knife for scoring, parchment paper or a peel, a spray bottle for adding moisture, and a baking tray for steam creation.
How do I properly mix and knead the dough for French bread?
Begin by mixing dry ingredients briefly, then gradually incorporate water until a shaggy dough forms. Knead the dough until it’s smooth and elastic, using either a stand mixer or hand-kneading. Ensure proper gluten development through the windowpane test.
What is the importance of proofing in bread baking?
Proofing allows the dough to ferment and rise, developing flavor and texture. The dough should undergo two main rises: the first for flavor development and the second after shaping to achieve the desired loaf size.
How do I create a crusty exterior on my French bread?
Preheat the baking stone and use steam during baking to create a crusty exterior. Score the dough just before baking and bake at a high temperature until golden brown. Adding moisture through a spray bottle also helps develop the crust.
Why is resting the dough important between kneading and shaping?
Resting the dough allows the gluten to relax, making it easier to shape without deflating it. This step helps in maintaining the dough’s structure and achieving the final desired quality of the bread.
How should I transfer the dough to the oven for baking?
Use parchment paper or a peel to transfer the dough onto the preheated baking stone to ensure it maintains its shape and does not stick. This technique helps achieve an even bake and crust.
What should I do if my dough isn’t rising properly?
If the dough isn’t rising, it may be too cold. Move it to a warmer area or proof it in an unheated oven. Ensuring proper yeast activation and using quality ingredients can also resolve rising issues.
How long should I cool the French bread before slicing?
Allow the bread to cool for at least a couple of hours before slicing. This cooling period is crucial as it lets the crumb set and the flavors meld, ensuring the perfect internal texture and flavor.